
Homeowner guide
How to prepare a room for painting
A safe, step-by-step room-preparation checklist that helps homeowners protect belongings, spot limits, and get a comparable painting scope.
Published October 5, 2026
By the HomeFAQ Editorial Team · Reviewed for accuracy.
https://homefaq.com/painting/how-to-prepare-a-room-for-painting/
Printing is unavailable. Use your browser’s Print command.
How to prepare a room for painting
For a room with sound, ordinary painted surfaces, the safest preparation is mostly organization: clear and protect belongings, clean accessible walls, note visible damage, choose the paint details you know, and leave repairs or hazardous paint disturbance to the right professional. Do not turn preparation into demolition. If the home was built before 1978, the paint is peeling or damaged, or you expect sanding, scraping, or repair that disturbs old paint, pause and ask a qualified professional how lead-safe work or testing applies before doing that work yourself.
This guide is for a homeowner planning an interior paint project and trying to make the room ready without hiding a condition that changes the scope. The goal is not to make every wall perfect. It is to give a painter a clean, accessible room and a useful record of what needs discussion.
1. Decide whether preparation is the right next step
Start with a slow, well-lit walk-through. Look for ordinary scuffs, small nail holes, loose caulk at trim, stains, peeling paint, cracks, soft drywall, musty odor, or signs of water such as a recurring stain. Take a few dated photos from floor level and write down where each issue appears. A photograph helps a professional understand the starting condition; it does not diagnose the cause.
You can normally prepare an accessible room with intact paint by moving belongings and cleaning it. Stop and seek qualified assessment before paint work if you see active water, a bulging ceiling, soft or crumbling material, widespread peeling, damaged plaster, suspected mold, exposed wiring, or a stain that returns after cleaning. Painting can improve a finish, but it does not fix a leak, electrical issue, or structural problem.
For pre-1978 housing, do not sand, scrape, or otherwise disturb old paint just to get the room ready. The Environmental Protection Agency (EPA) explains that renovation can create lead dust and that covered paid renovation in pre-1978 homes is subject to its Renovation, Repair and Painting Rule. Ask the painter what evaluation, containment, cleaning, and documentation are appropriate for the actual scope. 1
2. Make the room accessible and protect what stays
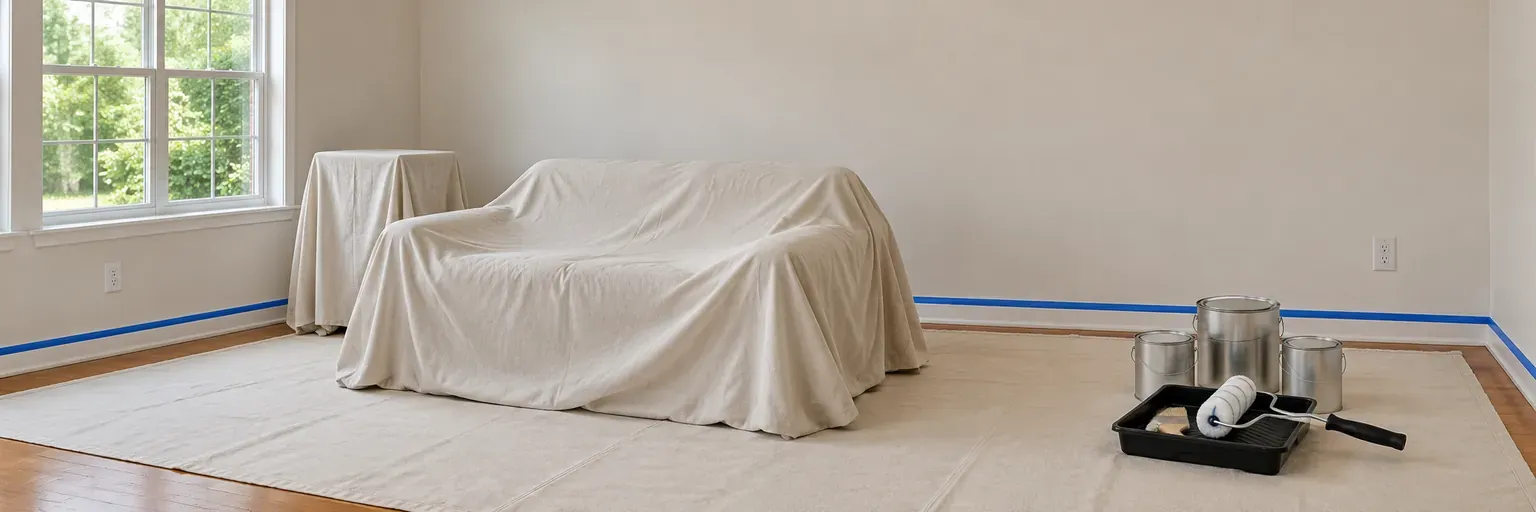
Remove small breakable items, electronics, wall décor, window treatments that can be taken down safely, and anything you do not want exposed to dust or splatter. Move lightweight furniture away from the walls. If a heavy piece cannot be moved safely, tell the painter where it will remain; do not strain yourself or drag it across flooring to create an empty room.
Cover remaining furniture with clean, non-slip coverings that can be secured without blocking exits. Clear a path from the entry to each work area. Keep children, pets, and household members out of the work zone while work is underway. Identify any alarm sensors, smoke alarms, thermostats, delicate fixtures, or built-ins that need a plan before work begins. A painter should state whether removal, masking, or a separate trade is needed rather than treating those items as assumed.
Protect floors according to their surface and the painter’s direction. Do not tape directly to a finish you are unsure will release cleanly, and do not cover vents, radiators, electrical panels, or exits. Preparation should make the work safer and more predictable, not create a trip hazard or prevent normal emergency access.
3. Clean only accessible, intact surfaces
Dust ceilings, trim, and walls with a soft cloth or vacuum attachment used gently. For washable painted walls, use a mild cleaner and water as directed by the product label, then allow the surface to dry. Kitchen grease, bathroom residue, and hand marks can affect how a new coating adheres, but aggressive scrubbing, solvents, or abrasive pads can damage a finish or create more repair work.
Do not wash a wall with an active leak or scrub loose, chalking, cracked, or peeling paint. Do not use a heat gun or dry sanding as a shortcut for old paint. If a room has a strong odor, recurring stain, or visible growth, describe it to a qualified professional before painting. Ventilation may help a room dry and remain comfortable, but it does not establish that a moisture source has been corrected.
4. Separate cosmetic notes from repair decisions
Use painter’s tape or a written list to identify accessible small holes, scuffs, gaps, and cracks you want discussed. Do not assume every mark belongs in the paint scope. A tiny nail hole may be routine patching; a long crack, loose tape joint, soft area, or water-stained ceiling may need a repair decision first. Ask the painter to distinguish included minor preparation from repairs, carpentry, drywall, or investigation that need a separate written approval.
Masking is a way to protect edges and adjacent surfaces; it is not a substitute for repairing a failed joint or stopping moisture. Leave trim, outlets, switches, and fixtures in place unless the person responsible for that work says removal is safe. Never remove an electrical cover or fixture to paint around it unless you are qualified to do so and the work is safely de-energized. A licensed electrician, not a painting scope, should address damaged covers, warm outlets, exposed wiring, or a circuit concern.
5. Give the painter usable color and finish information
Before work starts, write down the room, surfaces included, color name or sample, and desired sheen—the amount of light reflected by the dried paint. Note whether ceilings, baseboards, doors, windows, closets, or built-ins are part of the project. If you have not selected a product, say so rather than assuming a proposal includes a particular paint line, primer, stain blocker, or number of coats.
Ask for a small sample area or written color-confirmation process if color is important. Lighting can make the same color look different from morning to evening, and a painter may need to explain how a deep color change, stain, repair, or glossy existing surface affects primer or coat needs. This is a scope conversation, not a promise that every existing surface will look identical after painting.
6. Plan ventilation, timing, and handoff
Discuss which rooms must remain usable, any sensitivities in the household, window access, pets, and when furniture can return. Follow the selected paint product’s label and the painter’s instructions about ventilation, drying, and re-entry. Do not assume open windows are appropriate in every weather condition or that a room is ready for normal use as soon as it feels dry.
At handoff, walk through the room in normal light and compare the completed surfaces with the written scope. Keep the product names, colors, sheen, and any repair notes with your home records. If work reveals a new condition, ask for a plain-language explanation, options, price effect, and written approval before added work proceeds when practical.
Room-preparation checklist
- Photograph and list visible stains, peeling, cracks, and damage from a safe position.
- Remove valuables and fragile items; move only furniture you can handle safely.
- Keep exits, vents, electrical panels, and walking paths clear.
- Gently clean intact, accessible surfaces and allow them to dry.
- Record the rooms, surfaces, color, sheen, and items that need masking or a separate plan.
- Tell the painter about pre-1978 construction, water clues, odors, damaged surfaces, or electrical concerns.
- Ask what preparation, repairs, protection, cleanup, and change approval are included in writing.
Next, use How much should house painting cost? to turn these notes into a comparable written painting scope.
Questions to ask your painting professional
- Which cleaning, patching, caulking, priming, masking, furniture protection, and cleanup steps are included for this room, and which are excluded?
- Do the peeling areas, stains, cracks, or pre-1978 paint conditions change the preparation plan or require lead-safe procedures, testing, or another qualified assessment?
- If preparation exposes moisture damage, failed drywall, or another condition outside painting, how will you document it and get my approval before adding work?
Sources
Footnotes
-
U.S. Environmental Protection Agency, Renovation, Repair and Painting Program — federal lead-safe renovation information for pre-1978 housing. ↩
Be ready for the conversation
3 questions to ask your painting professional
- 1What surface condition, preparation, repair, primer, paint system, and finish level does this scope include?
- 2Which protection, access, furniture moving, cleanup, lead-safe practices, and minor repairs are included or excluded?
- 3If preparation reveals moisture, failed material, or another condition, how will you document it before changing the price or scope?
Keep planning
Related painting guides
How much should house painting cost?
A U.S. scope-first guide to comparing interior and exterior painting estimates when one national price range would hide the preparation and access that matter.
How to compare house painting estimates
Compare house painting proposals by the surfaces, preparation, coating system, access, protection, exclusions, and written change process—not the total alone.
Painting terms homeowners should know
Understand the painting words that affect preparation, products, safety, and what a written house-painting estimate actually includes.